Let me preface this post by declaring I am quite green when it comes to color correction. I have a clear understanding of the process, how it works, and what’s involved, but was unable to achieve the balance I saw in other’s work. Well not anymore (sort of)! It’s kind of like Jiu Jitsu. You may learn how to do an armbar in your first class, but it will take years and years of practice to master. Even more important, is that mastering an arm bar requires a clear understanding of each step in the process, and when to execute it. I always felt like an idiot when I was struggling to learn how to properly finish a move, and a seasoned player would show me the simplest adjustment that made a world of difference. I would always wonder why I hadn’t thought of it first. Well lucky for this brown belt, the same is true for color correction.
It’s the Order that Matters Most
While reading one of my favorite blogs from Shane Hurlburt, I picked up the details I had been missing in my process from a post by Vashi Nedomansky of Vashi Visuals. Here is the tip on the ‘Order of Operations’ that enlightened this color challenged editor:
To maintain image quality and to preserve as much info as possible, it’s important to do things in the proper order. Just as you wouldn’t ice a cake before you bake it, when you apply an effect is critical. I have always achieved great results using Stu Maschwitz’s advice. Doing Color Correction on your footage in this order will help you maintain extremely high quality in the interaction of all the effects you use. Not all steps are needed for every shot but in case you have to use them all, here they are:
- Remove artifacts and de-noise.
- Balance your shots by adjusting BLACKS/MIDS/WHITES, SATURATION and WHITE BALANCE.
- Relight within a shot using power windows or masks.
- Add gradients, diffusion and other lens filters.
- Add vignettes
- Grade your images
- Simulate a film stock of your choice
- Resize and sharpen
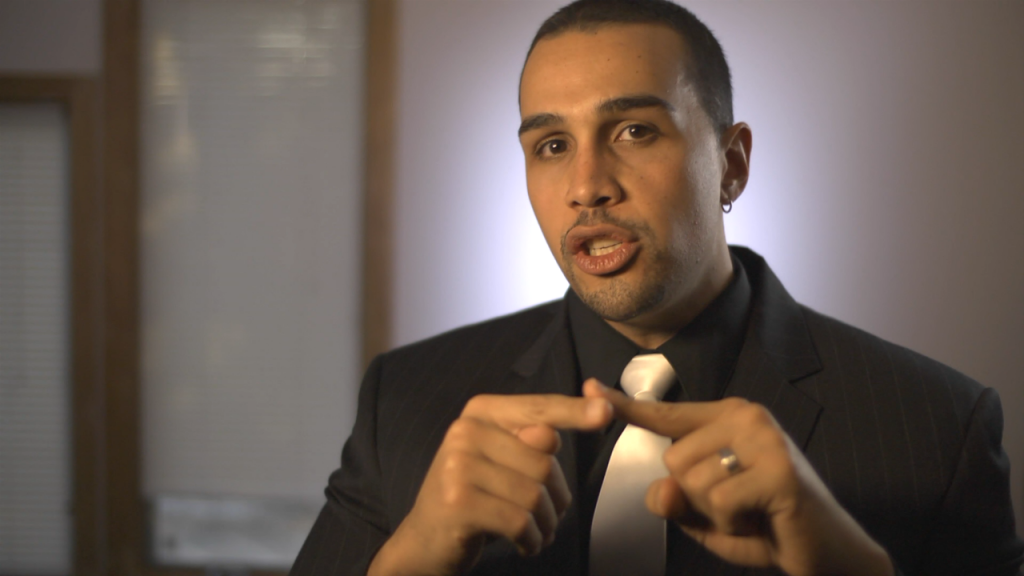
The Original (before CC)
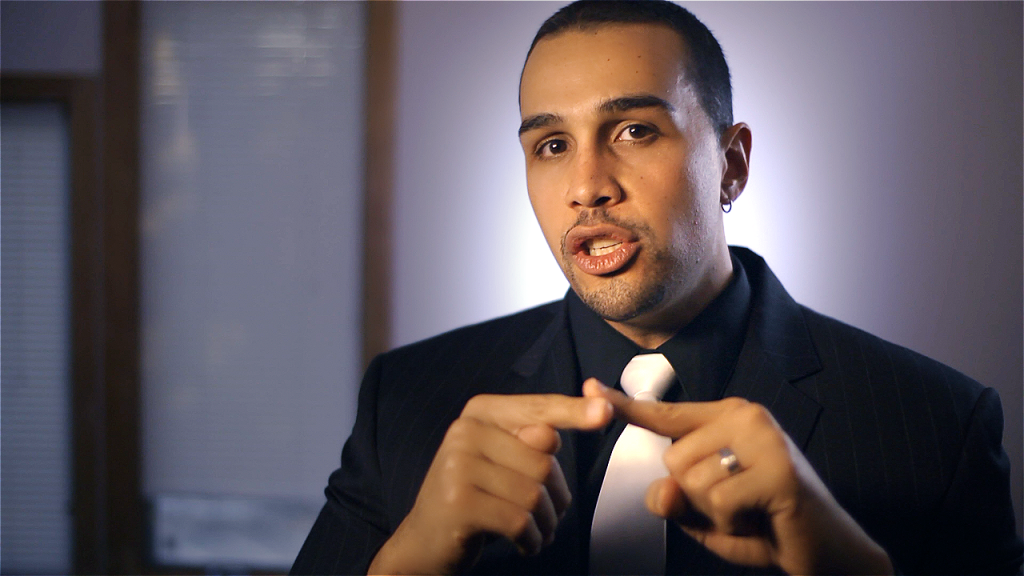
The Results (after CC)
They say the proof is in the pudding. I recently shot a simple interview style digital download for Hurricane Marketing Enterprises. After reading this, I immediately erased all of the prior color correction, and went to work. I had been using Colorista II and Looks, plus some sharpening because it was shot on the AF100. However, I was executing this process completely backwards. I would start out trying to balance the shot using the color correction workspace in Premiere Pro CS6, with the RGB Parade, Vectorscope, and YC Wave. Now, I always understood the goals when using these tools, but never knew there was a specific order to follow. So, I would start out with the midtones first to fill out the RGB Parade, and then adjust the master levels for RGB, blue, green, and red in Colorista.
Well, this is completely WRONG!
Taking Vashi’s advice, which he picked up from Stu Maschwitz, I started over. This time, I grabbed the Fast Color Corrector first, native in premiere. I adjusted the hue, and the black and white input levels. It is important to remember when making adjustements that there is a balance involved. You can’t change one thing, without affecting another. So I use the RGB parade to make the adjustments while keeping a keen eye on how it affects the skin tone line on the vectorscope.
Once I have achieved the balance I am looking for in RGB parade, I move on to Colorista II. You don’t need Colorista to do this, but I find it to be the easiest tool to do so. In colorista, I mostly stick to the Master controls to adjust RGB levels in curves. Other than that, I also learned a neat trick when adjusting the midtones. As you raise the midtones, you are going to lose saturation. So it is important to your shot’s balance that you raise the saturation to compensate for any time you raise the mids.
Besides the curves and the saturation, the other useful tools in Colorista is the primary density and exposure parameters. I try to never adjust the exposure level, as I have found with the footage I mostly shoot on, it just adds to much noise. However, the density parameter can be useful to adjust up and down the waveforms in the RGB parade.
Finally, once I had what I wanted, I finished up adding in some sharpening and then a customized look from Magic Bullet looks.The look just added a vignette, a little adjustment to the highlights, and some Cosmo to remove some noise from the subject’s face. Check out this screencast as I go over exactly what I learned.
Related Links (in case you missed them above):
- The inspiration from Hurlblog: 7 Tips for HD Color Correction and DSLR Color Correction
- From Premium Beat: What is a Vectorscope
If you found this content valuable, please follow me on twitter or like us on facebook to receive future updates!


